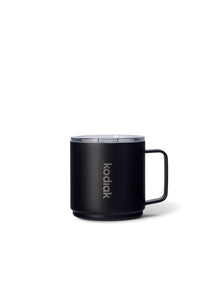


A lukewarm drink halfway up a steep track can take the shine off a great day. The right insulated bottle for hiking keeps cold water genuinely refreshing, protects hot coffee on frosty starts, and stands up to being knocked around in a daypack, ute or campsite tub.
But hiking bottles are not one-size-fits-all. A short coastal walk, an all-day alpine mission and a weekend spent roaming dry country demand different things. Here is how to choose a bottle that earns its place in your pack.
What an insulated bottle for hiking needs to do
At its core, an insulated bottle should hold temperature for hours. Double-wall vacuum insulation creates a gap between the inner and outer walls, slowing heat transfer far more effectively than a single-wall bottle. That means ice water stays cold when the sun is beating down, while tea or coffee stays warm through an early trailhead start.
Temperature retention matters, but it is only part of the job. Hiking gear gets dropped, packed beside keys and stove parts, shoved into side pockets, and left on rocky ground. Look for a durable stainless-steel body that can take the knocks without becoming a disposable piece of kit. A tough powder-coated finish also gives you a better grip when your hands are wet or dusty.
The best bottle is the one you will actually carry and use. That usually comes down to a smart balance of capacity, weight, access and a lid that does not leak when the track gets rough.
Start with your hike, not the bottle
Before comparing colours or lid styles, think about where you are going and how you drink on the move.
For a quick morning loop or an easy walk close to town, a 500 mL to 750 mL insulated bottle is often spot on. It fits easily in a pack pocket, adds limited weight and carries enough water if refill points are available. It is also a good size for a coffee on a cool-weather stroll.
A 1 L bottle makes more sense for long day hikes, exposed tracks and summer conditions. It gives you useful capacity without becoming too awkward to handle. The trade-off is simple: more water means more weight. One litre of water weighs one kilogram before you count the bottle itself, so do not overpack just because a bigger bottle is available.
For longer hikes, an insulated bottle is often best used alongside a hydration bladder or larger water storage. Use the bladder for easy drinking while walking and keep the insulated bottle for ice-cold water, electrolytes or a hot drink. That combination keeps your favourite drink at the temperature you want without relying on one heavy bottle to cover every need.
Match capacity to water availability
Australia’s conditions can turn a modest walk into a thirsty one. Heat, humidity, elevation, pace and shade all change how much you need. Check the route, weather forecast and confirmed water sources before leaving. A bottle with brilliant insulation cannot solve poor water planning.
If you are treating water on the trail, consider how the bottle works with your filter or purification method. A wide-mouth opening is easier to fill from a creek or collapsible reservoir, although you should always follow local advice on water safety.
Choose a lid built for your pace
The lid is where hiking convenience either comes together or falls apart. It affects leak resistance, cleaning, drinking speed and how easily you can use the bottle with one hand.
A screw-top lid is the no-nonsense choice for rough travel. It is typically secure, simple and dependable inside a packed bag. It is ideal when you want to fill the bottle with ice, use it for hot drinks, or toss it in the boot after a muddy walk. The downside is that stopping to unscrew a cap is slower than sipping through a straw.
A straw lid is brilliant for frequent hydration. You can take a quick drink without tipping the bottle, which is handy on steady terrain or when you are walking with trekking poles. Check that it closes securely and is designed to resist leaks. Straw systems have more components, so they need a little more attention when cleaning.
A chug-style lid offers a middle ground: faster flow than a standard cap, with less fuss than a straw. For hikers who prefer a proper mouthful of cold water at breaks, it is a solid option.
For hot drinks, use a lid made specifically for hot liquids and follow its temperature guidance. Never assume every straw or flip lid is suitable for a scalding brew. Steam and pressure can make a rushed sip a bad idea.
Wide mouth or narrow mouth?
A wide-mouth bottle is the practical all-rounder for most hikers. It makes adding ice easy, takes a proper scrub brush and lets you see what is going on inside. It is also more useful around camp, where you might want to fill it from a larger water container or use it for a warm drink.
A narrow-mouth bottle is easier to drink from while walking and is less likely to slosh onto your shirt. It can be a good choice for commuters who take the same bottle from the train platform to the trailhead. The catch is that it can be harder to clean and less convenient to fill with ice.
There is no universal winner. If your priority is icy water and easy cleaning, go wide. If quick, controlled drinking is your main concern, a narrower opening may suit you better.
Build quality matters when the track gets rough
An insulated bottle for hiking should feel solid without feeling like dead weight. Food-grade stainless steel is a reliable choice because it does not retain flavours the way some plastics can. Your water should not taste like yesterday’s sports drink or last weekend’s coffee.
Pay attention to the details that get tested outdoors: a secure lid thread, a strong carry handle or loop, a stable base, and an exterior finish that stays grippy when wet. A bottle that rattles loose from a pack pocket or leaks onto your spare jumper is not adventure-ready.
Colour is not just a style call, either. A bold bottle is easier to spot at a rest stop, in long grass or among a pile of gear at camp. Pick one that suits your kit and is hard to leave behind.
Kodiak drinkware is made for this kind of crossover - hard-use days outside, then the gym, worksite or daily commute without missing a beat. That versatility is worth looking for in any bottle you buy.
Do not chase insulation at the expense of carry comfort
More insulation and heavier steel can improve temperature control, but every gram matters when you are several kilometres into a climb. The aim is not to buy the heaviest bottle possible. It is to choose one that gives you dependable performance for the conditions you actually hike in.
For a cool winter walk, a compact insulated bottle with coffee may be more valuable than carrying an oversized water bottle. For a summer hike with no shade, cold water can make regular hydration far more appealing. In both cases, the bottle should fit your pack’s side pocket or internal sleeve securely. Measure if you are unsure, especially with wide bases and oversized handles.
Also consider noise. Metal bottles can clank against cookware, trekking poles or other bottles. A snug pocket, bottle sleeve or thoughtful packing arrangement keeps the soundtrack focused on birdsong rather than gear bouncing around.
Keep your bottle clean and trail-ready
A premium bottle lasts longer when it is cleaned properly. Rinse it after every hike, especially after electrolyte mixes, cordial, coffee or protein drinks. Those residues can build up in threads, seals and straw parts, leaving odours behind.
Wash the lid separately and give the gasket attention. If your bottle is dishwasher-safe, that makes routine care easier, but check the manufacturer’s instructions before loading it in. For a deeper clean, use warm soapy water and a bottle brush, then let every part air-dry fully before reassembling.
On the trail, keep the mouthpiece out of dirt and avoid placing the lid directly on dusty rocks. Small habits make a difference when you are drinking from the same bottle all day.
Pack it for the conditions you will face
Fill your bottle with cold water and ice before a hot-weather hike, but leave enough room for the lid to close without forcing it. On cold mornings, pre-warm the bottle with hot water for a minute before adding your drink. That simple step helps it hold heat longer.
Keep the bottle where you can reach it. If stopping to dig through your pack feels like a chore, you will drink less often than you should. A secure side pocket is ideal, while an internal sleeve is better when scrambling or travelling over uneven ground.
Choose a bottle that can take the dust, heat and hard kilometres, then make it part of your pre-hike routine. Cold water waiting at the lookout is a small reward, but after a big climb, it feels like a good one.